Archiving with Microsoft 365 (formerly Office 365)
This manual describes the Setup of Microsoft 365 in order to archive internal E-Mails with the REDDOXX MailDepot.
The technology behind is based on Journaling, which means that all E-Mails are duplicated first.
You need to be logged on as administrator in your Microsoft 365.
Further more, the Office Plan needs to have the Journal Feature to have the Journaling available.
Further information covering the different Microsoft 365 versions can be found here.
A dedicated User for Journaling is needed to interact between REDDOXX MailDepot and Microsoft 365.
In the Examples, the user ReddoxxMailDepot is used.
You may choose other Names as well.
It is not possible to send the duplicated journal mails to an Microsoft 365 User inside or outside from other Microsoft 365 instances.
This is a Microsoft restriction.
You can use either the POP3 Connector or the SMTP Connector for archiving.
For POP3 Connector, you just need any external Mailbox outside of Microsoft 365.
For SMTP Connector, you need to configure the MX Record of an available extra domain (or subdomain) to route mails to your appliance.
Log on as Administrator at https://portal.microsoftonline.com.
Switch to the Exchange Online Administration to continue with the setup.
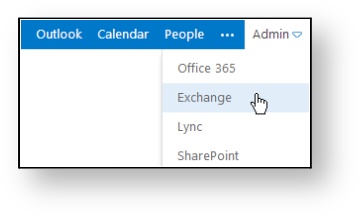
As a result of Microsofts restriction, it is only possible to use external contacts for journaling.
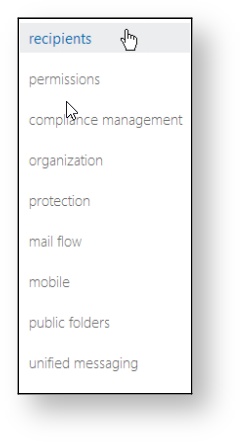
Select „recipients“ in the left panel view and then „contacts“.
A new mail contact can be added with a click at the + symbol.
You need to add a valid external contact.
This cannot be an internal or external Microsoft 365 contact!
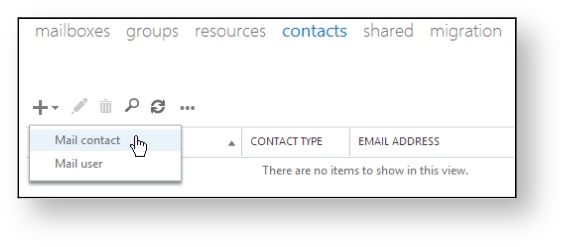
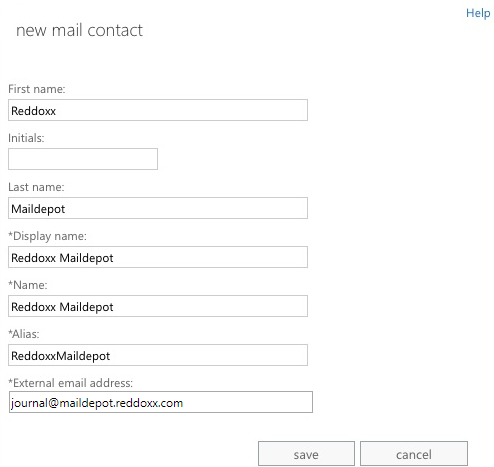
Insert your external contact that is to be used for journaling and confirm with „Save“.
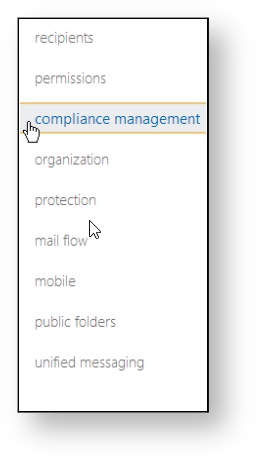
Switch to „compliance management“ in the left panel view.
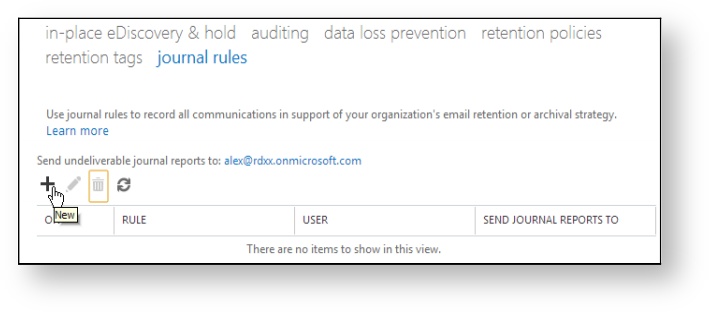
Select „journal rules“ in the next view and create a new rule with a click at the + symbol.
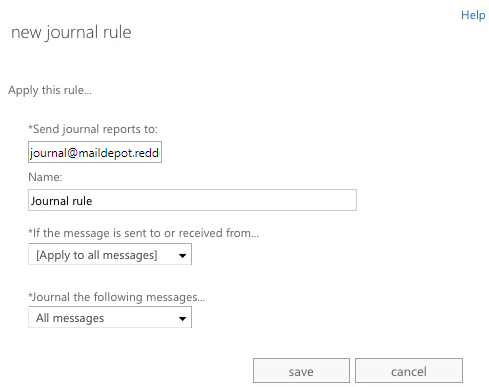
In this case, the journal will be send to created external contact.
The journal name can be the default or anything else to describe the rule.
The rule needs to be applied for all sender and recipients and for all messages.
So the option „all messages“ is selected.
It is also possible to further adjust the rule, if you only like to archive the internal mails or only mails from specified users or groups.
„Save“ will confirm the setting and is setting the rule active for all new messages.

The POP3 Connector configuration is descriped in the Reddoxx manual.
In the POP3 Connector you can configure mailboxes to be checked for new mails in an interval.
Mails in the mailbox will be moved to the connectors spooler and deleted from the Mailbox.
The collected mails will be moved to the global spooler and then archived in the default Container.
Important: The mails collected by the POP3 Connector will be deleted from the Mailbox!
- Login via Webbrowser to your REDDOXX Appliance (http://Appliance-IP/rws/desktop) and select "MailDepot"
- Select "POP3 Connector"
- Create a new POP3 Account (Add Account)
- Insert the hostname of the server
- Adjust the transport security if neccessary.
- Provide the POP3 User credentials for the journaluser
- Confirm the settings with "Save"
- Start the POP3 Service via "Enable Service"
To make sure that the journaling is working correctly, following steps can be performed:
- Polling the Mails in POP3 Connector
Start the collection of Mails with your POP3 Connector (REDDOXX MailDepot → MailDepot Connectors → POP3 Connector).
After the connect, the number of Mails that will be loaded is shown.
With right click at the configured POP3 Account a „poll now“ can be performed.
The POP3 Queue is showing the polled mails.
This list can be refreshed with F5.
Further Information can be found in the Admin Manual. - Transfer Mails to Archiv Queue
The mails will be transfered from the POP3 Queue into the Archiv-Queue (the Archivspooler) where they will be processed (archived).
This view can be refreshed with F5. - Containerlist view
Switch to the Containerlist (REDDOXX MailDepot → Archive Container).
The Number of archived documents in the default container should increase.
This view can be refreshed with F5. - Livelog
Further more, you can watch the processing of mails in the LiveLog.
If an error occurs, a message will appear in the POP3 Account list.
At every pick up interval, if an error occurs, a message will be sent to the REDDOXX Administrator.
Possible errors which can occur:
- No connection to the POP3 server. The server is not reachable.
- Invalid user name or invalid password.
- Corrupt mail format. The file needs to be deleted from the server, this is usually the first mail in the list.
- ERR Command is not valid in this state.
The transmission encryption settings between mailserver and client (REDDOXX Appliance) do not match.
Adjust the settings accordingly (e.g. TLS might be required)
- Configure an MX Record for an available domain or subdomain to point to your Appliance (respectively your company firewall)
e.g. maildepot.yourdomain.tld where your journal user in exchange online is set to anything@maildepot.yourdomain.tld - In appliance admin webinterface, go to configuration => network => network interfaces and enable eth0:mdcon accordingly
- Activate the SMTP Connector (using port 25) in appliance admin webinterface => maildepot => maildepot connectors => smtp connector
- Configure your Firewall to forward mails for the mx record in step 1 to the appliance eth0:mdcon interface address